Wednesday, October 2, 2013

BACKPACK WALL...

So I decided to make my girls a backpack wall.

I had a little sign that had hooks on there before but decided I didn't like it so much.

And after I came across this post.... 
i fell in LOVE!


IMG_6859s


So I made it! My wall is a lot smaller than the other blog 
and I only have two kids... so I modified.

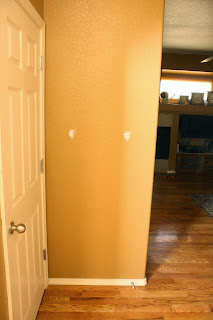
This is what my wall looked like before...


I measured out how high I wanted it to be and then 
how wide I wanted it to be.

It was a little tricky because our corners are bull-nosed so I just stopped it when it started to curve.

I bought the cheapest pine I could find at Home Depot. They're 1 x 4's for the surround, which are actually 1 x 3.5 inches! And then 1 x 2's for the inside, which are actually 1 x 1.5 inches! BEWARE!! 


I got all the boards up and then caulked the life out of it! 


I was going to paint it white but I thought with the baseboards and the basement door being right next to it, it may look kinda funny since those are painted a cream color. So I went with the Cream Paint I already had! I bought some chalkboard paint, hooks and VOILA... the backpack wall was done! 


My Girls were at School... So I just used some shopping bags. 
It's Awesome!

Now I just need to blow up this Beautiful Picture of them and put it up!


WOOD WALL...

Last Summer I had an idea to use old Fence Pickets and hang them sideways to make an Artsy Wall in our House... little did I know a month later it would be all over Pinterest! It was actually an Amy Original, I just wasn't quite fast enough. Here's a pic of our Family Room, I took some pics of the progress but I can't seem to find them now! Bummer...

I started with Old Fence Pickets I found in a Dump Yard, cut off the angled edges and then just nailed them to the Wall. I didn't do any staining or sanding or anything.

Start in the middle of the wall, make sure you level the first picket really well. And start working your way out and down from there! I did the very top pickets last, the pickets are 3.5inches wide, the last of my space was about 2 inches wide. So I put the picket right on top of the last picket that's attached to the wall, so the very top picket sticks out a little bit but you can never tell! Plus, it looks like a header then! 


UP MURAL...

November 2010
Another girlfriend of mine wanted a mural from the Movie UP...
I remember watching the movie and when Carl and Ellie were getting the nursery ready there was this Mural that Ellie was painting. They only show it for a quick couple of seconds but I loved it! And thought that's what I would do in her room! I put my little one in there for size comparison.


TREE PAINTING...

February 2013
My fabulous girlfriend was having twins back in February and she asked if I would paint a mural for her babe's room. She said she wanted to do a tree and I found this one online.
So I painted it!! Super cute... and the babe's are amazing!


BANISTER RE-DO...

March 2013
We bought our house back in 2009, which you would think there would be some modern touches especially since it was a model before that, but no. We had these fabulous banisters that were a marvelous Oak color, not a fan.
After doing a ton of research online and everyone said to use Porch/ Patio Paint. It didn't take much convincing on my husband's part, he's game for anything. So we took down the Banister to make it easier to paint around the spindles, I don't know if I would do that again...


 I kept having day dreams that my girls were waking up in the middle of the night and falling off the ledge! So they slept in our room for a few nights until the project was done!


I sanded and sanded some more then started slapping the paint on. I probably did five coats of the paint over a few days, then let it dry really well for a few days. And just used a rub on 
Polyurethane and it was done! 
Oh and we had to put the Banister back up... not super fun. 
I did nail the spindles back down but I don't have a picture of that! 


 \

I would suggest leaving it all together and taking the time to sand and paint around all the spindles. 
But we love it! I'm thinking about painting the goose necks a cream color... but not today!